Wednesday, February 13, 2013

Valentine Shortbread Cookies and Magical Icing


Wow! Can you believe it has been over a YEAR since I last posted?!?! I have been a very bad blogger this year. Well, you know how it is. Life happens. Mother Maxine, also known as my dear sweet mother, has been hounding me to post on my blog. The truth is I haven't been baking a whole lot in the last year. But, I will try better this year to post things when I do cook.

Now on to the sweets!

I have been searching for many, many years for a perfect iced cookie. I think I've mentioned before that I really do not enjoy icing cookies. Part of that is that I have never landed on a recipe that really worked. Either the cookies spread to much or the icing dripped all over. Usually I just made a mess and threw the whole thing out. Well, I finally found that perfect recipe.These absolutely melt in your mouth. The whole cup of cornstarch gives it this effect so don't skip it! I found this recipe over at Sweetopia. She is the master of all things coated in Royal icing.She has some really awesome tips on decorating iced cookies that I found really helpful.

 Don't let the process scare you away. There does seem to be a lot of steps (cool the dough, roll the dough, cool the dough, etc), but it is absolutely worth every minute!
Hope you all have a wonderful Valentine's day!!
Enjoy!!

Valentine Shortbread Cookies
Recipe courtesy of Sweetopia

1 lb. (454 gr) butter, room temperature
1 cup (5 oz. or 142 g) icing sugar
(confectioner’s or powdered sugar)
1 cup (5 oz. or 142 g) cornstarch
3 cups (15 oz. or 425 g) flour
1 tsp pure vanilla extract
1 tsp pure almond extract

1. In the bowl of an electric mixer fitted with a paddle
attachment or with a hand mixer, beat the butter* on medium
speed for about 30 seconds. You may need to scrape down
the sides of your bowl with a spatula at least once.
2. In a separate bowl, sift your icing sugar, cornstarch and
flour together.
3. Add your sifted ingredients to the bowl with the butter, and
mix on low speed, just until all ingredients are incorporated.
4. Roll the dough out between 2 large pieces of parchment
paper. Place on a baking sheet and into the fridge for a
minimum of one hour.

5.Cut cold dough with cookie cutters. Remove scraps, reroll and repeat.
6. Place cookie dough shapes back in the fridge to chill for
approximately one hour.
7. Preheat your oven to 350°F. Bake cookies for about 15 minutes until bottoms are just browned.
Cool and ice.

Magical Royal Icing
recipe courtesy of Sweetopia
6 oz (3/4 cup) of warm water
5 Tablespoons Meringue Powder
1 teaspoon cream of tartar
1 kilogram (2.25 lbs.) powdered icing sugar

1 tsp pure vanilla extract
1 tsp pure almond extract
*** Note; if your meringue powder has no vanilla flavor (vanillin powder) in it, add a teaspoon of clear vanilla to this recipe.
 Directions:
In mixer bowl, pour in the warm water and the meringue powder. Mix it with a whisk by hand until it is frothy and thickened…about 30 seconds.
Add the cream of tartar and mix for 30 seconds more.
Pour in all the icing sugar at once and place the bowl on the mixer.
Using the paddle attachment on the LOWEST speed, mix slowly for a full 10 minutes. Icing will get thick and creamy.
Cover the bowl with a dampened tea-towel to prevent crusting and drying.


Friday, December 16, 2011

Cherry White Chocolate Pecan Cookies with Princess Runwilder


For those of you that are new to Sinful Southern Sweets, please meet my youngest baby, Princess Runwilder.

She looks so serious here, because she is about to embark on the very serious art of baking. She is normally a sweet,silly little 3 yr old goofball.Oh look, she finally got back to normal after a few minutes in front of the camera.


Princess Runwilder is the younger sister of Princess Runwild.

She is a sweet, silly 6 yr old goofball. We have been given strict instructions by Princess Runwild not to EVER do anything fun while she is at school. So, if you see my little Princess Runwild, please don't tell her that Runwilder got to bake cookies today. Also, I wouldn't mention that her little sister was wearing her pink polka dot rockstar hairband....she gets her feathers in a fluff about things like that. Runwilder and I both know it. We take turns wearing the pink polka dot rockstar headband:)

So, today the little Runwilder helped me bake cookies. She likes to bake. She doesn't even lick her fingers during the process. Such a professional:)


Runwilder did not really want to use the electric mixer. She wanted to mix it with a spoon. I tried to tell her you only did that when you had no other choice. But, she was insistent. I let her. After 20 minutes she was bored and had not gotten the spoon turned around the bowl more than half a dozen times.  We turned on the electric mixer. Showed the kid the beauty of electricity.

I have for many years glared at the candied cherries in the grocery stores at Christmastime wondering what I would use them for. They are the bright red cherries in plastic tubs camped out next to the mixed candied fruit that people use to make fruit cake. They are not the same as marachino cherries, that you find in a jar. But you could use those, drained. You'll just end up with pink cookies from the small amount of cherry juice. If you like cherries, you will love these cookies. Both the Runwild Princesses  gave them a thumbs up!


Enjoy!

Cherry White Chocolate Pecan Cookies

Ingredients

  • 1 stick butter, softened
  • 1 cup packed brown sugar
  • 1 cup granulated sugar
  • 2 large eggs
  • 1 teaspoon vanilla extract
  • 3 cups all-purpose flour
  • 1 teaspoon baking soda
  • 1/2 teaspoon salt
  • 2 tablespoons milk
  • 1 cup chopped pecans
  • 1/2 cup chopped candied cherries
  • 1 1/2 cups white chocolate chunks

Directions

Preheat oven to 375 degrees F.

In a medium bowl, with electric mixer, cream butter and sugars together until light and fluffy. Add eggs and vanilla and beat until just combined. Set aside.

Sift together flour, soda, and salt. Add milk to the butter mixture and then add the flour mixture. Mix until just combined. 

In another bowl, combine nuts, cherries, and white chocolate. Then add to batter, stirring only to blend. Drop by heaping tablespoons onto a greased cookie sheet, 2 inches apart. Bake for approximately 11 to 13 minutes. Cool on wire rack.

Tuesday, December 13, 2011

Peppermint Marble Cookies


I think I've mentioned before that I'm not terribly talented at icing cookies. Don't get me wrong, I love iced cookies. They are usually very yummy and I think they are beautiful. But, I'm just not good at keeping a steady perfect line when piping around the exterior. I usually make a huge mess. When I'm not good at things, I just won't do them. So, without iced cookies on a goody tray, there don't tend to be a lot of colorful cookies. Undoubtedly, when I start pulling together my Christmas goody trays, I start realizing that that everything is brown and white. And, though I have not had any complaints thus far, I thought these Peppermint Marble Cookies would add the perfect splash of color for our holiday treat trays. And best of all... no decorating with icing! Yea!

Enjoy!


Peppermint Marble Cookies

1 cup butter or margarine, softened
1/3 cup powdered sugar
1 teaspoon vanilla extract
2 cups all-purpose flour
1/4 teaspoon peppermint extract
1/4 teaspoon red food color
2 tablespoons granulated sugar

1. Heat oven to 350 degrees F. In large bowl, beat butter, powdered sugar and vanilla extract with electric mixer on medium speed, or mix with spoon. Stir in flour. Divide dough in half. Stir peppermint extract and food color into one half of dough. Divide each color of dough in half. Wrap in plastic wrap and chill for 30 minutes.

2. Once the dough is chilled roll each of the doughs out to 1/4 inch thick rectangle.  Cut each rectangle in half.  Working with one half each of the white and red dough, place the white on top of the red and fold the dough in half and then in half again.  Flatten the dough, roll into a log,  fold the dough in half and flatten again.Roll the dough into a tight log, wrap with plastic and chill for at least two hours, or as many as three days.   Repeat with the remaining dough.

3.Cut into 1/4" slices. Place about 1 inch apart on ungreased cookie sheet. .

4. Bake cookies 7 to 9 minutes or until set. Remove from cookie sheet to wire rack; cool.

Thursday, October 27, 2011

Monster's Eyeballs And Free Printable Tags


So, Lets talk Halloween food. You know, I really like holiday inspired food. And, Halloween is no exception. Now, I admit, I usually tend to steer towards the cutesy stuff. Hey, I have 2 little princesses. They like the pumpkins, jack o lanterns and sweet smiley ghosts. Though as they've gotten older, they think the mildly grotesque inspired treats are somewhat cool. So, I'm not opposed for the most part. But, the other day I ran across this....

Oh my! No, no, no! This is just wrong...
There should never be cute little chubby baby arms poking out of mounds of chocolate cupcakes. Uhhgghh....Man, that just brings back those horrid thoughts of that sweet little blonde headed baby Gage from the movie Pet Cemetary that went horribly bad.
Soooo don't need that visual. Don't do this. Nobody likes to see sweet mixed with gorry....

On the other hand, I'm perfectly ok with eating eyeballs ;)
Well, as long as they're Monster's Eyeballs- peanut butter toffee balls coated with white chocolate. Bring on the eyeballs!
I learned a few things about making the eyeballs. First, don't skimp on the colored part of the eye and don't use mini chocolate chips. Big colored circle and full sized chocolate chip. The others might pass for something you'd find at a bachelor's party....


You can use a red food safe marker to draw some squiggly lines to make them appear bloodshot, but I'm not so much into eating things that look like their bloody.
Eyeballs I'll eat.
Bloody eyeballs... even filled with peanut butter....something about it just seems wrong. I know, I'm a weirdo

These are essentially just your basic peanut butter balls that you find on many a homemade christmas tray, but I've added toffee chips for a little something different. Eyeballs with crunch. Good stuff.

Bag up some of these Monster's Eyeballs and give them to your neighbors, your kids' friends or your kids' teachers. Here is a close up of the monster eyeball tags.
Click here to download the Monster's Eyeballs gift tags I've made up just for your gifting pleasure. Hope you love them!
Enjoy!

 Monster Eyeballs
1 1/2 cups creamy peanut butter (I used Natural Skippy w/honey)
1/2 cup butter, softened
2 1/2 cups confectioners' sugar, sifted
1 tablespoon vanilla extract
1/2 block Almond Bark (white candy coating)
2 drops blue food coloring
1/2 cup semisweet chocolate chips
1 c toffee bits (Heath)

Directions

  1. Beat the peanut butter and butter with an electric mixer in a large bowl until smooth. Beat in the sugar and vanilla. Stir in toffee bits. Cover and refrigerate for 30 minutes. Roll chilled dough into small, eyeball-sized balls and place on 2 baking sheets lined with wax paper. Freeze for another 30 minutes.
  2. Melt the white chocolate coating in a microwave-safe glass or ceramic bowl in 30-second intervals, stirring after each melting, for 1 to 3 minutes (depending on your microwave). Do not overheat or chocolate will scorch. Dip each eyeball into the white chocolate and transfer to the waxed paper until the chocolate has set. You can chill them in the refrigerator.
  3. Stir a few drops of blue food coloring into the remaining melted white chocolate. Make a round  "Iris" on the top of the cooled eyeball and press a chocolate chip in the center for a "pupil." Don't press to hard or you'll crack the cooled white coating. 

Wednesday, October 19, 2011

Tate's Bake Shop Cookie Winner!!


Forgive my tardiness on this announcement, but the winner of the Tate's Bake Shop Cookie Giveaway is 

Karen 

Karen, I've sent you an email. Let me know your shipping address and I'll have Tate's get your prize on its way!


Thanks for entering!


Friday, October 14, 2011

I've Been Boo'd! Have You Been Boo'd? Free Boo Printables and Chocolate Boo Cookies

Have you seen the "We've Been Boo'd" signs all around town yet?? Tis the Season....

So,  Are you wondering what up with all this talk about getting 'Boo'd?" Well, we're not talking about some vindictive behavior toward stage performers or anything like that. Around this time of year, many people participate in a little neighborhood game known as "Boo-ing." Its kind of a Halloween take on "Secret Santa."
To start a Halloween BOO, one neighbor secretly leaves a small gift, a BOO poem(that includes the  BOO instructions) and a BOO sign  at a neighbor's doorstep.
The lucky BOO-ee is asked to post the sign near the door, alerting others that "We've Been BOO-d!" That way, new BOO recruits won't leave a duplicate BOO on the doorstep.
In turn, the neighbor is asked to BOO two other households, leading to a chain reaction--and lots of Halloween fun. This is especially fun if you've got kids in your neighborhood, but I think the adults enjoy it just as much.
Day by day, the BOO signs proliferate. Soon, the entire neighborhood is sporting BOO signs. Sounds like fun, right?? Right. So, I'm gonna help you get starting on your very own BOO adventure. I've created  some BOO printables for you to download. There are gift tags, a BOO sign and a BOO Poem.
Click here to Download the Boo Sign , Click Here to Download the Gift Tags , Click Here to Download the Poem with Instructions for Boo-ing. All of these were printed on 8.5x11 cardstock. Tags cut with 2 5/16 circle punch.


Don't you love the little ghost with the top hat? I thought he was a very charming fella' and perfect for our BOO.

But, first you have to decide what you're going to leave as your BOO gift. Really, it can be anything. Some people do small gifts like candles, Halloween trinkets or something store bought that is age appropriate for the neighbor they are buying for. Me, well, I like the home baked treats. I miss the days when neighbors made popcorn balls and candied apples for the kids. Then, BAM!, somewhere in the mid to late '80's everybody got  scared that weirdos were trying to slip razor blades into the Halloween treats. So, no more popcorn balls and candied apples for us:( Isn't that always how it goes, one weirdo ruined it for everybody! Well, I'm hoping if we really wrap our treats super cute with these cute little tags and such maybe no one will think we're trying to poison them or slip sharp metal objects to their children. Let's bring back the home baked Halloween goodies!! But, just in case, you could always slip a little note in to let them know who baked the goodies, in case their not on the home baked Halloween goody bandwagon yet...

So, for my Boo treats, I decided on these great Chocolate Cookies that are wrapped around York Peppermint Patty Pumpkins.
I do have one word of advice on these. Don't wrap too much cookie dough around the Peppermint Patty. If you do, the end result will look like a fried egg that originated from a chocolate chicken. Look:

See, I'm not kidding. This is serious stuff. Nobody wants Chocolate Chicken Cookies for their BOO treat. So, just go easy on the dough. Cover the patty, but not with a heavy hand.
Otherwise, they are very simple, just bake them and let them cool on the pan.

Then, you're ready to wrap your little treat up and deliver it with your BOO gift tags, sign and BOO Poem.

Part of the fun is delivering the BOO without getting caught. So, try to do the delivering after dark!

Enjoy!

Chocolate Peppermint Patty Boo Cookies
Ingredients
  • 2/3 cup butter or margarine, softened
  • 1 cup sugar
  • 1 egg
  • 1 tablespoon milk
  • 1/2 teaspoon vanilla extract
  • 1-1/2 cups all-purpose flour
  • 1/3 cup Cocoa powder
  • 1/2 teaspoon baking soda
  • 1/4 teaspoon salt
  • 24 to 26 small (1-1/2 inch) YORK Peppermint Patties
  • White decorator's sugar

Directions

  1.  Beat butter and sugar in large mixing bowl; add egg, milk and vanilla, blending thoroughly. Stir together flour, cocoa, baking soda and salt. Add to butter mixture, blending well. Refrigerate dough about 1 hour or until firm enough to handle. (Dough will be a little soft.)
  2.  Heat oven to 350°F. Lightly grease cookie sheet or line with parchment paper. Remove wrappers from peppermint patties.
  3.  Roll dough into 1-1/4 inch balls. For each cookie flatten ball slightly; press peppermint pattie into dough. Mold dough around pattie so that it is completely covered. Place on prepared cookie sheet. Sprinkle with decorator's sugar or sprinkles.
  4.  Bake 12 to 14 minutes or until cookie is set; sprinkle with additional sugar, if desired. Cool slightly; remove from cookie sheet to wire rack. Cool completely.


Tuesday, October 4, 2011

Double Cookie Layer Dessert AND Tate's Cookie Giveaway!!


*Please read to the end of the post for the Tate's Cookie recipe.

Did you know that October is National Cookie Month? Yes, that's right. So, I thought we should to start this month off with a recipe including cookies. This is not just a cookie recipe, but a layered recipe containing some of the best purchased cookies around: cookies from Tate's Bake Shop. If you've forgotten about Tate's, I did a review about this sweet Bake Shop last year. You can read about it here.


To celebrate National Cookie Month, Tate's asked me to try out some of their newest cookies, the Whole Wheat Dark Chocolate Chip cookie –which won GOLD in the Cookie category in the 2011 sofi™ Awards, presented at the Fancy Food Show (known as the Oscars® of the specialty food industry) in Washington, DC. 

Well, you know me. I'm not one to turn down award winning chocolate chip cookies. So, I fell in love with Tate's all over again. There are so many positive things to say about these great cookies. My favorite thing about them- besides the fact that they are thin and crunchy and buttery and addictive- is that they are natural. You know what makes homemade cookies so wonderful? Well, it has a lot to do with the fact that they are simple and not stuffed with every conceivable preservative on earth.  Tate's Whole Wheat Dark Chocolate Chip Cookies, which do not taste whole wheat in the slightest, contain 10 ingredients: chocolate chips, wheat flour, sugar, brown sugar, butter, eggs, baking soda, salt, vanilla and water. I don't know about you, but that's what I make my own chocolate chip cookies with too! Its very rare to find packaged cookies that taste like homemade, but Tate's has got it perfected with their buttery, crunchy cookies.


Ok, so back to the recipe. This is a classic layered dessert. Great combination of crunchy meets creamy. I've had it many times, but never so good. It begins with a nutty shortbread like crust enhanced with a few of Tate's cookies. This layer is baked and cooled and topped with a cream cheese layer. This layer is covered with crumbled Tate's cookies, Oreo Pudding and Cool Whip. The perfect beginning to Cookie Month!! Enjoy!**Please read on after recipe for GIVEAWAY!!


Double Cookie Layer Dessert
featuring Tate's Bake Shop Cookies!
  • 1 cup flour
  • 1/2 cup nuts, chopped
  • 1/2 cup butter, softened
  • 8 ounces cream cheese
  • 1 cup powdered sugar
  • 1 (8 ounce) container Cool Whip, divided
  •   1 large pkg Oreo Jello instant pudding mix (any flavor is fine)
  • 3 cups milk
  • 1 bag Tate's Bake Shop cookies

Directions:

  1. Preheat oven to 350°.
  2. Combine the flour, nuts, butter and 3 crumbled Tate's cookies.
  3. Press mixture into a 13x9-inch pan.
  4. Bake 10-15 minutes.
  5. While cooling, combine the cream cheese, powdered sugar and 1 cup Cool Whip.
  6. Spread over first layer. Crumble remaining cookies (reserve 1/4 cup) Top cream cheese layer with remaining cookies (except for the 1/4 cup). Set aside.
  7. Mix the pudding and milk until semi-set; pour on creamy layer
    Spread with remaining Cool Whip. Top with 1/4 cup remaining crumbled cookies. Chill.
GIVEAWAY TIME!
Now, if you've hung around this long, you're probably waiting for the Tate's Giveaway. Tate's Bake Shop is in the celebrating mood too! In honor of National Cookie Month, they are offering Sinful Southern Sweets readers 15% off your purchase the entire month of October when you use the discount code COOKIE at checkout. Also, they will are giving one lucky winner three bags of the Whole Wheat Dark Chocolate Chip cookies and a signed copy of Kathleen King’s cookbook, The Tate’s Bake Shop Cookbook
Yea for National Cookie Month!!
To enter the contest:

To enter the giveaway to win 3 Bags of Tate's Cookie Whole Wheat Dark Chocolate Chip Cookies and Tate's Cookbook:
1)Be a Google Follower of Sinful Southern Sweets:You must do this before any other entry can be made.
2) Like Tate's Bake Shop on Facebook
3) Like Southern Sweets on Facebook
4) Follow Sinful Southern Sweets on Twitter 

5)Follow Tate's Bake Shop on Twitter

**Please leave a separate comment for each entry you make. Leave your email in your comment, if it is not visible in your profile. We want to be able to get you those cookies if you win!!

Giveaway will end on October 15th at midnight. Winner to be announced October 16th and chosen via Random.org. Entries open only to US residents. Good Luck!!


Thursday, August 25, 2011

Grapico Ice Cream

It's still hot here in my neck of the woods. Each and every year around this time, the sweltering southerners start thinking two things:

1) "This has been the hottest summer of my life!"-Of course it hasn't been. Not really. In my memory, the hottest summer was many years ago, when I was about 3 or 4. I can still remember my little legs sticking to the seats of my parents car. I wasn't sure if my skin had melted into that burgundy vinyl or vice versa. Yet, within minutes afterward, that freakishly hot vinyl had created so much sweat on the backs of my legs, I thought I was going to slip right off the seat. Oh the memories....

2) "This summer is never going to end!"-Ok, so maybe we're a bit dramatic, but it does start to feel that way when your summer season runs from about March to November!

So, if you're sweating out the dog days of summer as well, then I've got the perfect recipe for you. Well, I have the perfect recipe for you if you live in the South. It is my understanding that Grapico (a carbonated grape drink) is only sold in the South. I can't say for sure, since I've never thought to look for a Grapico on the rare occasions that I've traveled outside of my hometown. But, if this is the case, perhaps you could use some other grape soft drink, or you could certainly use another flavor.

This recipe is probably the simplest form of ice cream you will come across. You'll find a few variations on this, but this is my favorite.

Enjoy!

Grapico Ice Cream

2 liter of Grapico
3 cans of condensed milk (not evaporated)

Stir together Grapico and condensed milk. Refrigerate overnight or at least 6 hours until mixture is chilled.
Freeze in an ice cream maker according to manufacturer's directions.


Thursday, August 11, 2011

Winner Winner! Cookbook Winner!

I realize I am a few days late posting this. But, this has been a hectic time of year. Coming back from vacation and immediately starting to get Princess Runwild ready to start school. Whew!
So, no more delays....The winner of Whitney Miller's cookbook Modern Hospitality is

Cindy
cindyskitchen@yahoo.com

Cindy, I have sent you an email. If you can send me your mailing address, we will have this shipped out to you.

Thanks for all your comments!! I will be back with a recipe within a few days after I get everything settled down a bit.

Take Care,


Monday, July 25, 2011

No Name Bars & A Cookbook Giveaway!


"In 2010, America watched amateur cook, Whitney Miller, crush the competition and become the first winner of FOX’s hit show MasterChef. The seemingly demure Mississippi belle proved she had not only nerves of steel but true culinary chops. Now, in her eagerly anticipated first cookbook MODERN HOSPITALITY: Simple Recipes with Southern Charm, Whitney treats readers to a fresh take on classic dishes that have been passed down throughout generations of Southern women in her family."1
When Gordon Ramsay, one of the judges for MasterChef,  first met Whitney Miller, her humble and soft spoken attitude was said to make Gordon think "she was a sweet lamb heading toward inevitable slaughter."2 Yet, I believe they strongly underestimated the southern belle from Poplarville, Mississippi. In the end, with a dish of fried chicken and creamed collard greens, Ms. Whitney Miller became the winner of Masterchef. Since Masterchef, she has gone on to open a successful cafe and catering business and has written her first cookbook, MODERN HOSPITALITY: Simple Recipes with Southern Charm.
I was honored to be asked to review Ms. Millers cookbook. The cookbook is simply stunning. There is a beautiful shabby-chic appeal in all the page coloring and  food photography. Lots of interesting vintage linens paired with mouth watering recipes. I love Whitney's merging of her favorite recipes with the beautiful southern table settings. The lovely bone china tea cups filled with her Game Day Chili (on page 46), is perfect example. It's what her cookbook is all about. Modern hospitality... mixing the old with the new and embracing southern charm at its finest.
Of course, you know me. My very favorite part of the cookbook would include something from the sweet selections. After much deliberation in choosing the first recipe to try,  I finally decided on a recipe called No Name Bars. Ms. Miller indicates they "are too good for words," hence the reason she had trouble giving them a name. No doubt, she nailed it right on the head. The bars are similar to a gooey butter cake or a chess bar, but they have a very buttery crust with a filling that is a cross between that of a cheesecake and a custard. Their simplicity makes it easy to top them with anything from a sweet fruit reduction to a chocolate sauce. Or, you could just leave them plain and consume half a pan, as is. That appeared to be my preference:)
Enjoy!  

No Name Bars
from MODERN HOSPITALITY: Simple Recipes with Southern Charm by Whitney Miller 
Ingredients:
Crust:
1 1/2 sticks, unsalted butter, melted
3/4 c. white granulated sugar
1 1/2 all purpose flour
1/2 tsp baking powder
1/2 tsp baking soda
1/2 tsp salt
1 tsp vanilla extract

Filling:
1 pkg (8oz) cream cheese, softened
2 large eggs
4 TBSP unsalted butter, melted
1 tsp vanilla extract
3 1/2 c powdered (confectioner's) sugar

Preheat oven to 350 degrees. Grease 9x13 baking dish.
 To make the crust: Mix the butter and white sugar together in a med. bowl. In another bowl combine the flour, baking soda, baking powder and salt. Add flour mixture to salt mixture and mix until combined. Spread into greased baking dish. 

For filling:
Beat cream cheese with mixer until smooth. Add the eggs and mix. Stir in the melted butter and vanilla. Add powdered sugar. Spread on top of crust. Bake for 38 minutes. Let cool at least 5 minutes before cutting into squares.  

GIVEAWAY TIME!!!!
If you'd like to win your own copy of Whitney's cookbook MODERN HOSPITALITY, you are in luck. Along with my review copy, I was offered the chance to giveaway a copy to one of my Sinful Southern Sweets readers! So, its very simple, just leave me a comment, any comment (well, preferably a nice one:). You can leave up to 3 comments per day. The giveaway will end August 7th. Winner will be chosen randomly. Please make sure to include your email if its not listed in your profile. Good luck!!

BOOK SIGNINGS AND EVENTS FOR WHITNEY MILLER
July 7th - EveryDay Gourmet - Jackson, MS, Book signing
July 8th - TurnRow Books- Greenwood, MS, Book signing
July 8th - Viking Cooking School - Cooking demo (6 -7:30 pm)
July 9th - Uptown Interiors- Bay St Louis, MS, book signing
July 11th - Square Books - Oxford, MS, book signing (5-7 pm)
July 12th - L’Ecole Culinaire, cooking demo and book singing (12-2pm)
July 12th - The Booksellers at Laurelwood- Memphis, TN - book signing (6-8pm)
July 14th - Page & Palette - Fairhope, AL, cooking demo and book signing
July 15th - Apple's Limited - Poplarville, MS, book signing (5-7pm) 
July 16th - Viking Cooking Classic- Madison, MS, cooking demo and signing
July 19th - Melinda's Fine Gifts and More - Picayune, MS, book signing (6-8 pm)
July 22nd - Sam’s Club- McDonough, GA, book singing
July 24th - Women’s Health “Are You Game” event- Chicago, IL, cooking demo and book signing (11am-4pm)
July 29th-30th - MS's Hospitality Pageant - Hattiesburg, MS, celebrity judge and book signing
August 4th - Books a Million - Birmingham, AL, book signing (12noon-2pm)
August 6th - Barnes & Noble- Savannah, GA, book signing (2-4pm)
August 13th - Books a Million - Slidell, LA, book signing (12-2 pm)
August 15th - The Kitchen Table- Hattiesburg, MS, cooking demo and book signing
1/reference from Rodale publicity release
2/reference from forward by Gordon Ramsay from MODERN HOSPITALITY


Tuesday, July 12, 2011

Sinful Salty & Sweet Brownies


Do you ever have days when you just want to consume your entire caloric expenditure in junk??
No....
Oh....No, I don't either...
Often.....
Ok, so not this week, but its only Tuesday.

Anyways, if we were going to be crazy and just force ourselves to indulge in quite possibly the most sinful treat ever, I was thinking this Sinful Salty & Sweet Brownie might fit the bill. I concocted it one day when I might have been having a bit of a need for junk food. It combines the very best of both salty and sweet. Hidden within this gooey caramel brownie resides the following:
1)Chocolate Covered Pretzels, 2) Mars Candy Bars (which I completely forgot existed until I was scouting out the candy isle at Walmart one day) 3)Caramello Bars (Oh how I love thee...) and  4) Potato chips (you can use the light/fat free potato chips if it makes you feel better). Its all baked in a Ghiradelli Caramel Turtle Brownie Mix. Yes, I kid you not. Its all in there. So, if you're serious and you've never wasted all your daily calories on junk food....well, my  friend, its never too late!

Enjoy!

Sinful Salty & Sweet Brownies

Ingredients:
Ghiradelli Caramel Turtle Brownie Mix
1 egg
1/3 c. oil
1/4 cup water
2 Mars candy bars, chopped
3 Caramello bars, chopped
1/2 c potato chips, crushed
1/2 bag Flipz milk chocolate covered pretzels, chopped

Preheat oven to 325 degrees. Mix together the brownie mix (set aside the caramel packet), egg, oil and water. Into a greased 9x9 pan, spoon half the brownie mixture. Top brownie mixture with Mars bars, potato chips, choc. covered pretzels and caramello bars. Spoon theremaining brownie mixture over previous layer. Drizzle caramel (from brownie mix) over the top. Gently swirl into mixture.
Bake at 325 degrees for 36-40 minutes.


Sunday, July 3, 2011

Patriotic Fruit Pizza


You can turn on nearly any news channel and see countries around the world battling it out for what we all take for granted...Freedom. We have no real concept of what these countries experience on a day to day basis. For the last 235 years, we have had men and women leaving their families and loved ones to defend our country so that we do not ever have to know what a country without freedom is like to endure.

It was once said "This country isn't perfect, but the concepts on which this great nation were founded - life, liberty and the pursuit of happiness - most certainly are." While you're celebrating and grilling out and having a relaxing and enjoyable fourth of July weekend, lets all remember those men and women that have fought and continue to fight to keep our country free.


OK, so now that I'm off my patriotic soapbox, lets talk recipes. Its the day before the 4th. So, you've still got time to wrap up your sweet treat for tomorrow. Today's recipe is easy enough that it won't keep you in the kitchen all day, so you can make it today and relax all day tomorrow. Really, you could make it tomorrow and still enjoy the day.

This is called a Fruit Pizza, but it is not like a traditional pizza. It is more like a huge cookie topped with fruit and a frosting.If you want to skip some steps, you could substitute a refrigerated cookie dough for the crust on this recipe. Just bake it until its golden brown, and let cool completely. If you really wanted to cut corners, you could skip the cream cheese frosting and just use refrigerated whipped cream (the kind in the can). I'm not sure I'd be willing to part with the cream cheese frosting since I have tried it, but if you've not tried it, you won't know what you're missing out on anyways:)

OK, and if you're just a complete bum, you could go to the grocery store and buy one of the huge pre-made cookies from the bakery section. Scrape off the icing and start building on your cookie. Whichever way you decide, I hope you have a sweet and safe 4th of July!!
Enjoy!

Patriotic Fruit Pizza
Recipe via Taste of Home

Ingredients

  • CRUST:
  • 1 cup all-purpose flour
  • 1/2 cup confectioners' sugar
  • 1/2 cup cold butter

  • AMERICAN FLAG:
  • 2 packages (8 ounces each) cream cheese, softened
  • 1 cup sugar
  • 1 teaspoon vanilla extract
  • 1/2 teaspoon lemon juice
  • 2 cups halved fresh strawberries, 1/2 cup fresh blueberries

Directions

  • Crust: In a bowl, combine the flour and confectioners' sugar. Cut the butter into the dry ingredients until crumbly. Press the mixture onto a greased 12-in. pizza pan. Bake at 325° for 10-15 minutes or until the crust is lightly browned. Let cool.
  • American flag: In a bowl, beat the cream cheese and sugar. Add the vanilla and lemon juice, mixing until smooth. Spread 1 cup cream cheese mixture over the crust. Set the remaining cream cheese mixture aside.
  • Referring to the photo for position, arrange five rows of strawberries on top of the pizza to create the red strips of flag. Place the blueberries in the upper left corner.
  • Cut a hole in the corner of the plastic or pastry bag and insert the star tip. Fill the bag with the reserved cream cheese mixture. For the white stripes, pipe a zigzag pattern between the rows of strawberries.


Sunday, June 12, 2011

Friendship Bread Starter & Printables for Gifting!


Friendship Bread, also refered to as Amish Friendship Bread, has been a popular tradition for nearly 3 decades. Though often called Amish, it is said the bread did not derive, nor have any connection with the Amish. I don't know too much about its origins, but I know its a fabulous recipe and definitely entertaining. At least through the first several batches of starter:)
You should be warned. Usually, people have one of two reactions to Friendship Bread starter:
1) They have never seen or heard of it, and they are intrigued and delighted that you were so kind to think of them and share your starter (these are the people you want to seek out when you start dividing up your starter. Try to hide your sinister laugh as you pass along the bag. Just smile sweetly and pretend to be that gracious lady/gentlemen that loves to bring others joy.Sometimes ignorance is best:)
2) If the individual you are attempting to gift the starter to is not terribly interested in baking or perhaps they have been gifted the starter previously they may grumble at you or in worse case scenario, run the other way. Now, no offense is to be taken from these people. The thing is that when you make the starter for friendship bread, you mush the bag for 10 days, adding some ingredients on day 6 and on day 10 you divide the starter up and give 3 bags away, keep one for yourself and bake with the leftover starter from the previous batch. Well, if you keep a starter, you will divide again in 10 days and again in another 10 days and so on. What I'm getting at here is that the starter tends to multiply like bunnies.

If you haven't read the book Friendship Bread by Darien Gee, I highly recommend it! It is a great novel incorporating the funny tactics of getting rid of friendship bread starters, and how a small town pulled together to put the thousands of multiplied starters to use for a good cause.  You'll get pulled into the Friendship Bread Phenomenon, just like I did! I loved the Info section over at Friendship Bread Kitchen that ends the description with this:

"At the end of the day, Amish Friendship Bread is all about friendships and community. It’s about connection. It’s about fun. It’s about nurturing other people. It’s about not taking anything too seriously, but to find the simple joy and pleasure in every moment. Amish Friendship Bread is, in short, a recipe for living."


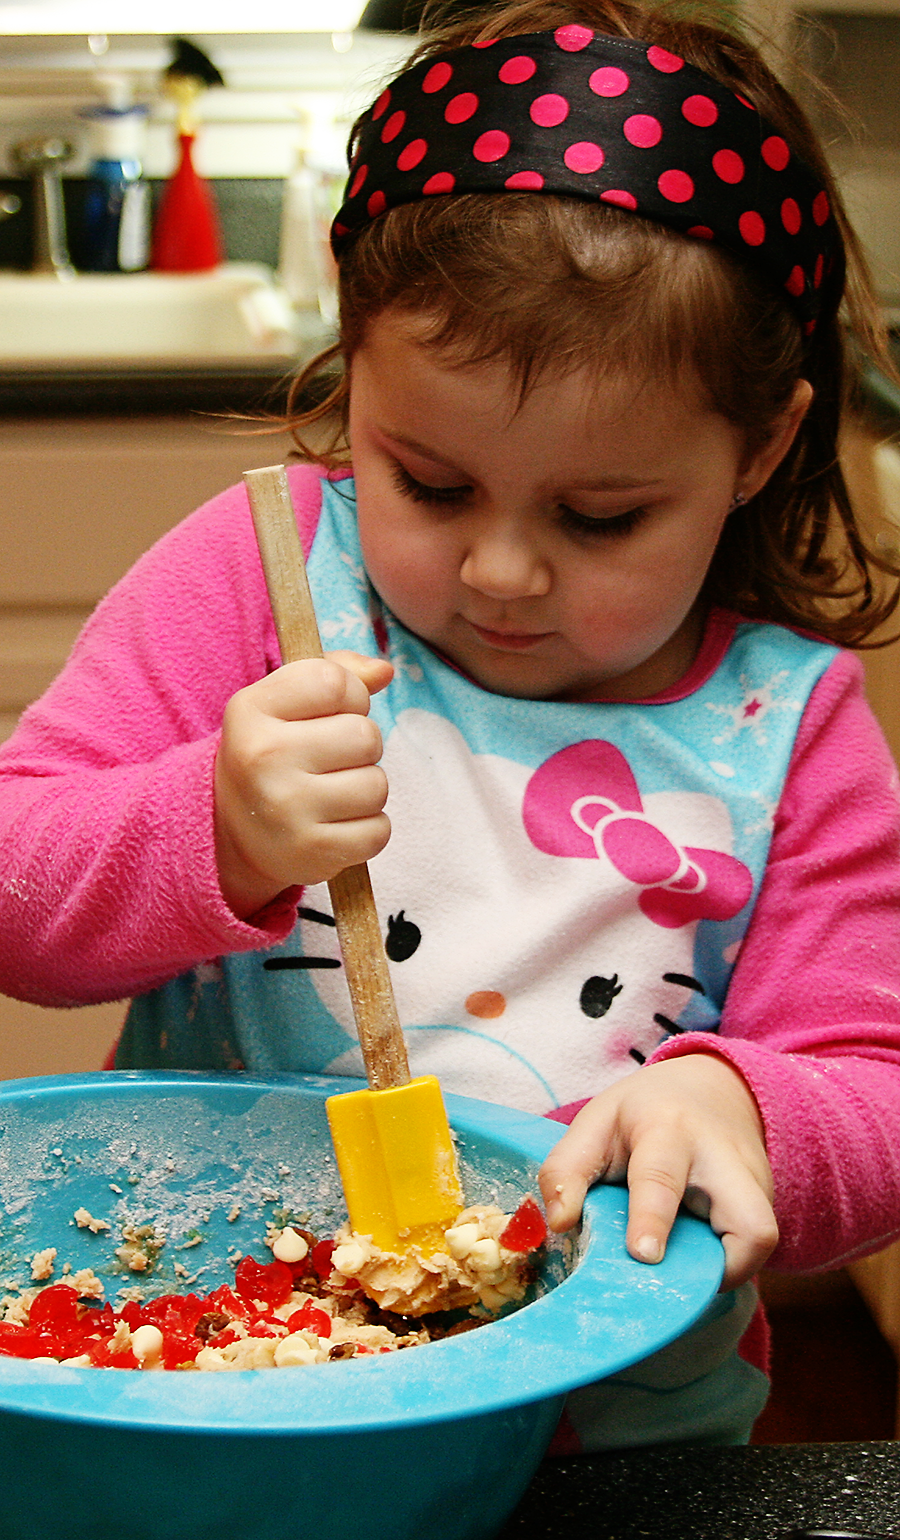
If the thought of finding individuals to share your starter with scares you, don't let it. There are other options. For instance, the starter freezes beautifully. Or just bake all the starter after 10 days and there is no more gifting or baking. Whatever course you choose, I highly recommend you give this recipe a try. If you have small children, I assure you they will love both the nurturing of the starter and the baking of the bread. My little Runwild Princesses fought all 10 days about who could "mush" the bag.
We just had to let everybody have a go at mushing the bag each day. Who knew the entertainment factor would be so high?!?

And as a little added incentive both to get you to try the recipe and to have luck giving it away, I made y'all a few cute little mermaid themed printables. I'm not sure why I choose mermaids, but I like them. Hope you do too!

So here's what you do. First print out the Friendship Bread tags here. Then print out the sheets with the Friendship Bread instructions here. You will need to get some kind of bag for gifting. I used plain white gift bags because I had those on hand for some reason. On day 10, separate your starters and bake your bread. Wrap up the bread, attaching the tags.

In the gift bag, include the instructions, a sample of the friendship bread and a bag of starter. Tie an extra label on the outside of the bag to make it extra fancy:)


Now here are the instructions beginning with the Starter. If someone has already gifted you a starter, you are in luck and can just use the printouts.

**Note: I have never mentioned this before, but please, please, please do not sell my printables. I don't sell them and nor should you:) These are for gifting purposes only.


Friendship Bread
Recipe from: Friendship Bread Kitchen
Starter:
Ingredients
1 (0.25 ounce) package active dry yeast
1/4 cup warm water (110° F/45° C)
1 cup all-purpose flour
1 cup white sugar
1 cup milk
Directions
  1. In a small bowl, dissolve yeast in water. Let stand 10 minutes.
  2. In a 2-quart glass, plastic or ceramic container, combine 1 cup flour and 1 cup sugar. Mix thoroughly with a whisk or fork.
  3. Slowly stir in 1 cup milk and dissolved yeast mixture.
  4. Cover loosely and let stand at room temperature until bubbly. Pour into a plastic ziptop bag, if desired. Consider this day 1 of the 10 day cycle. For the next 10 days handle starter according to the instructions for Amish Friendship Bread.
Notes:
The starter should be left at room temperature. Drape loosely with dish towel or plastic wrap. Do not use metal utensils or bowls. If using a sealed Ziploc bag, be sure to let the air out if the bag gets too puffy.
NOTE: Do not refrigerate starter. It is normal for the batter to rise and ferment. If air gets in the bag, let it out.
Instructions for Starter:
Day 1: Do nothing.
Day 2: Mash the bag.
Day 3: Mash the bag.
Day 4: Mash the bag.
Day 5: Mash the bag.
Day 6: Add to the bag: 1 cup flour, 1 cup sugar, 1 cup milk. Mash the bag.
Day 7: Mash the bag.
Day 8: Mash the bag.
Day 9: Mash the bag.
Day 10: Follow the directions below:
  1. Pour the entire bag into a nonmetal bowl.
  2. Add 1 1/2 cup flour, 1 1/2 cup sugar, 1 1/2 cup milk.
  3. Measure out 4 separate batters of 1 cup each into 4 (1-gallon) Ziploc bags.
  4. Keep one of the bags fr yourself, and give the other bags to 3 friendship along with the recipe.
REMEMBER: If you keep a starter for yourself, you will be baking in 10 days. The bread is very good and makes a great gift.
Should this recipe not be passed onto a friend on the first day, make sure to tell them which day it is when you present it to them.
BAKING INSTRUCTIONS:
1. Preheat oven to 325 degrees F.
2. To the remaining batter in a bowl add the following:
a. 3 eggs
b. 1 cup oil
c. 1/2 cup milk
d. 1 cup sugar
e. 1/2 teaspoon vanilla
f. 2 teaspoons cinnamon
g. 1 1/2 teaspoons baking powder
h. 1/2 teaspoon salt
i. 1/2 teaspoon baking soda
j. 2 cups flour
k. 1-2 boxes instant pudding (any flavor)
i. Optional: 1 cup nuts and 1 cup raisins
3. Grease 2 large loaf pans
a. In a bowl mix an additional 1/2 cup sugar and 1 1/2 teaspoon cinnamon.
b. Dust the greased pans with the cinnamon-sugar mixture.
4. Pour the batter evenly into the pans and sprinkle the remaining cinnamon-sugar mixture on the top.
5. Bake for one hour or until the bread loosens evenly from the sides and a toothpick inserted in the center of the bread comes out clean.
6. ENJOY!

Additional info:
There are a multitude of recipes to use this starter for. The one above is just the basic recipe. My Mother in Law had called a few days ago asking if there was a savory recipe to be used with the starter. I did not think there was, but I did actually end up finding several at the Amish Friendship Kitchen. So, if get bored with the basic recipe, just go look in the Friendship Kitchen recipe box and you'll find everything from Brownies to Cheesy Sourdough to Zucchini Bread. The possibilities are endless.
Have Fun and Enjoy!