Monday, May 31, 2010

Triple Layer Brownies


Happy Memorial Day!! Hope you all have great plans to get outside and have a little summertime fun. Today is the day that most consider to be the start of the summer/grilling season. But, please take a moment today to think about all the men and women that have served our country! This is of course why we really celebrate Memorial Day.

Today's recipe is a great layered bar cookie  that seems almost too good to be true. This would be the perfect ending for all your Memorial Day cookouts. The layers of this treat consist of a brownie layer, a cream cheese frosting layer, and a Rice Krispie/Peanut Butter/Chocolate layer. Need I say more?!?! Even better, this is quick to throw together since it is made from packaged convenience foods. No need to make homemade brownies and icing. Just grab a box of brownie mix and a tub of cream cheese icing. The flavors of this decadent treat are so good, no one will know you took a few shortcuts. The best part...you can actually sit back and enjoy relaxing today instead of slaving over dessert. Have a great Memorial Day! Enjoy!


Triple Layer Brownies
Recipe from Taste of Home

Ingredients

  • 1 package fudge brownie mix (13-inch x 9-inch pan size)
  • 1 package (11-1/2 ounces) milk chocolate chips
  • 1 cup peanut butter
  • 3 cups crisp rice cereal
  • 1 can (16 ounces) cream cheese frosting
  • 1 cup salted peanuts, chopped

Directions

  • Prepare and bake brownie mix according to package directions, using a greased 13-in. x 9-in. baking pan. Cool on a wire rack.
  • In a large saucepan, combine chocolate chips and peanut butter. Cook over low heat for 4-5 minutes or until blended, stirring occasionally. Stir in cereal; set aside.
  • Spread frosting over brownies. Sprinkle with peanuts. Spread with peanut butter mixture. Chill for 30 minutes or until set before cutting. Store in the refrigerator. Yield: about 5 dozen (I think this is stretching it a touch, maybe a little over a dozen, but I couldn't get 5 dozen from it)

Thursday, May 27, 2010

May 2010 Daring Bakers Challenge -Piece Montée


The May 2010 Daring Bakers’ challenge was hosted by Cat of Little Miss Cupcake. Cat challenged everyone to make a Piece montée, or Croquembouche, based on recipes from Peter Kump’s Baking School in Manhattan and Nick Malgieri.

I've certainly enjoyed my venture thus far as as a Daring Baker. I love going to the site on the day that the challenge is revealed. This month I was quiet surprised. I could not, nor can I now, even pronounce the name of the recipe to be made. You know us Southerners only speak southern. We just don't do so well with the precise accents of languages, such as French :) Oh, we can't help it, its just that special southern "twang" that is so easily recognized if we step outside of our born and bred southern regions. Anyways, despite my lack of pronunciation, I was very intrigued. Here are the key elements to create this beautiful tower:
Cream puff shells (also known as choux), Pastry cream and caramel.
I have always wanted to make cream puffs, and this was my chance. Well, my chance without too much guilt, since it was my challenge of the month:) I thought they were amazingly simple. Now, you should know, if you decide to make this, you can make the choux or cream puff shells a day in advance and freeze them. But, once the Piece Montee is assembled, it needs to be eaten that day. Preferably within a few hours. Cream puffs do not improve with flavor. Just to give you an idea of what to look for, here was my choux after piping it onto the baking sheets.
My point in showing you this is that its not all that tall. The "puffing" occurs during the baking time.
Here is the baked choux:


This tower of cream puffs known as a Piece Montee or Croquembouche is actually a traditional French wedding cake. I like the idea of this. Not so much frosting to mess up while decorating. I chose to decorate my Piece Montée with handmade gumpaste flowers.

  This was my first attempt with gumpaste, but I found it quite easy to make the flowers.
The filling on the cream puffs is a traditional french pastry cream also known as Vanilla Crème Patissiere. I used a Wilton Bismark Tip #230.

This will make your life much easier in the filling process, as the tip punctures the cream puff and fills, all at the same step. My honest opinion on the filing is that it tastes like vanilla pudding, but oh so good vanilla pudding. Like good, homemade southern vanilla pudding (I suppose you could call it a custard) that should be used to make the perfect banana pudding.
Though the Piece Montee requires several steps. None of the steps are overly complicated or require ingredients that cannot be easily obtained at your local grocery store. I highly recommend this for any special occasion. And I can absolutely see making this at Christmas time and using the cone-shape as a Christmas tree. Now, wouldn't that be cute! Enjoy!

Piece Montée
based on recipes from Peter Kump’s Baking School in Manhattan and Nick Malgieri


Crème Patissiere (Pastry Cream)

For the Vanilla Crème Patissiere (Half Batch)
1 cup (225 ml.) whole milk
2 Tbsp. cornstarch
6 Tbsp. (100 g.) sugar
1 large egg
2 large egg yolks
2 Tbsp. (30 g.) unsalted butter
1 Tsp. Vanilla

Pate a Choux (This is the dough for the cream puff shells)
¾ cup (175 ml.) water
6 Tbsp. (85 g.) unsalted butter
¼ Tsp. salt
1 Tbsp. sugar
1 cup (125 g.) all-purpose flour
4 large eggs
For Egg Wash: 1 egg and pinch of salt
Pre-heat oven to 425◦F/220◦C degrees. Line two baking sheets with parchment paper.

Preparing batter:
Combine water, butter, salt and sugar in a saucepan over medium heat. Bring to a boil and stir occasionally. At boil, remove from heat and sift in the flour, stirring to combine completely.
Return to heat and cook, stirring constantly until the batter dries slightly and begins to pull away from the sides of the pan.

Filling:
When you are ready to assemble your piece montée, using a plain pastry tip, pierce the bottom of each choux. Fill the choux with pastry cream using either the same tip or a star tip, and place on a paper-lined sheet. Choux can be refrigerated briefly at this point while you make your glaze.
Use one of these to top your choux and assemble your piece montée.

Hard Caramel Glaze:
1 cup (225 g.) sugar
½ teaspoon lemon juice
Combine sugar and lemon juice in a saucepan with a metal kitchen spoon stirring until the sugar resembles wet sand. Place on medium heat; heat without stirring until sugar starts to melt around the sides of the pan and the center begins to smoke. Begin to stir sugar. Continue heating, stirring occasionally until the sugar is a clear, amber color. Remove from heat immediately; place bottom of pan in ice water to stop the cooking. Use immediately.
Assembly of your Piece Montée:
You may want to lay out your unfilled, unglazed choux (cream puffs) in a practice design to get a feel for how to assemble the final dessert. For example, if making a conical shape, trace a circle (no bigger than 8 inches) on a piece of parchment to use as a pattern. Then take some of the larger choux and assemble them in the circle for the bottom layer. Practice seeing which pieces fit together best.
Once you are ready to assemble your piece montée, dip the top of each choux in your glaze (careful it may be still hot!), and start assembling on your cake board/plate/sheet. Continue dipping and adding choux in levels using the glaze to hold them together as you build up. Decorate as desired.

Tuesday, May 18, 2010

Boozed Up Recovery Brownies


The Sinful Southern Sweets Family has made it back home. Finally! I survived....barely. Oh, where did we go?? Well, "The Happiest Place on Earth", I have been told some call it, Disney World. "The Happiest Place on Earth" it was not. Adventuresome....it was. A little too adventuresome for me. Since returning, I am in need of some major sweet comfort food. I'm going to give you  a re-cap of my trip. Perhaps, it will give you some insight to my need for comfort and recovery.

1) Due to my husband's severe detestation of flying, we drove to Orlando. It takes a very long time to get to Orlando via car with children. We decided to break up the driving time into two days. So we stopped and spent the night a little over half way to our destination. This began our adventure. After blissfully sleeping for about 2 hours, the hotel fire alarm began blazing. I had never heard this sound before. Unfortunately, the phone and alarm clock received the brunt of my frustration. The sound was so loud we thought it was resonating from our heads. After nearly dismantling the alarm clock and leaving it by the front door, Mr. Sweets tells me he thinks its the hotel fire alarm. Though days later, he was still curious as to why I had taken the alarm clock over to the door. I have no answer. I only wanted the sound to stop. I suppose the hotel did not burn down, as we did continue our journey the next morning. I did, however, notice a large group of college soccer players in the lobby the next morning. I'm nearly certain that one of them was the culprit...
2) Despite the fire alarm incident, I still awoke at my normal time of 4am to have my coffee....alone. I stared at the coffee maker trying to figure out where the "pot" was. I finally figured out that it was some kind of fancy "Pod" coffee maker. To make a long story short, this coffee maker, made a cup of coffee at a time and shot it straight into your little styrofoam cup. And it was a 1 cup cup, not 2 cup cup. It took a long time to get my coffee fix that morning. 
3) We arrived to our destination to find Disney World an amazing place. Everything was very cute and dreamlike in the Magic Kingdom. The parking lots were even named after all the little Disney characters. Mainstreet USA smelled of sweet, freshly baked cookies. We rode the famous Dumbo ride. The children seemed happy. And for a moment, I was almost convinced that this truly was the happiest place on earth.
4)I awoke the first morning in our new hotel, to find that there was indeed a larger coffee pot. It was a 4 cup coffee pot! Whoohoo! Learned a very important lesson on this day. I will share so that you will not have to learn the way I did. Lesson: A 4-cup coffee pot will only brew 4 cups. If you insist on trying to brew 6 cups, the extra 2 cups will flow from the filter basket along with coffee grinds and pour onto all clothes, luggage and makeup that are lying on the floor below. Lovely!
5) Large resorts are very nice, but it could mean that you will have to walk about 2 miles through the hotel to get to breakfast. I decided that I could live without breakfast, as long as I had my coffee.. Unfortunately, the Runwilder girls do not like coffee and demanded I feed them actual food. So we got a good workout every morning before heading to the theme parks. A small price to pay, I suppose, for happy children.
5) For my husband, this was a business trip. He was in meetings and classes most of the time. So, I was alone with the girls when going to Disney World. I also had an extra little girl with me that was 8, since her dad was in meetings with my husband. On Saturday, we had a nice long day. Rode all the classic rides, saw the princesses, and began our walk back to the monorail (you must take this to get to the parking lots). Then, the 8 yr old decided she could walk no more. She was simply going to collapse. I let her sit for a few moments. I purchased $60 dollars worth of Mickey Mouse ears and 3 frozen lemonades for the girls. Apparently, bribery does help little legs to start functioning again. On the monorail, I decided to dig my keys out of my backpack, so the girls would not have to endure the Iraqi desert-like heat for a moment longer than needed. We get all the way to the parking lot (Pluto's Parking Lot, I believe it was) and I realized it. Those keys were no longer in my pocket. They had fallen out on the monorail....I was at a complete loss. I made my way to Lost and Found, then back to the monorail just to check to see if anyone turned them in. No, no keys. So, finally, I decided to catch a cab back to the hotel. Oh, but this was ok with the girls. They were squealing with excitement that they were going to get to ride in a yellow taxi cab. With no carseats! And no seatbelts!!! You can imagine my excitement as well..... We were greeted by Mr. Sweets at the hotel with a few kind words and lunch waiting in the room for us. He could have really given me a hard time, but he's nice like that :)  I did tell him that if the bill indicated that all the alcohol from the mini bar had been consumed, it was not a mistake. Disney+3 kids+lost keys WILL make a non-drinker turn to drinking. Oh, and just so you know. It does pay off to be obsessive compulsive when packing. Otherwise, we would not have had that extra set of keys packed away in the luggage.
6)My final adventure (that I'm willing to divulge) occurred the last night of the convention. There was a huge party. It was a costume karaoke party. Individuals that wanted to sing karaoke, could dress as their favorite singer. They were backed up on stage by a full band. Not your average karaoke!! Very nice party. The company required you wear your company credentials to enter so that every person staying in the hotel did not decide to join in on the very nice party. Nonetheless, I eventually decided despite all the fun,  the girls might be getting a little too rowdy for the karaoke party, so I headed back to the room with the girls. Now, the ballroom that the party was in was in the same area that breakfast had been served (2 miles from the room, or so it seemed). I get back to the room and realize my cell phone is missing. Made a $9 long distance call to Mr. Sweets, but he can't hear his phone over the karaoke music. So we got re-dressed, made the 2 mile trek back to the party. Get to the door and realize I have forgotten my darn credentials to get back in the party. Well, thankfully the guy at the door had already had a couple of drinks and was laughing it up with some fella' dressed like Willie Nelson, so was able to just slip in behind him. And I did in fact find my phone!!

Despite the fire alarm, the desert-like heat, the lost keys/phone, the lack of coffee/sleep, etc...we really did have a good time. We met some very nice people, and made some wonderful memories.  But, now you see why I'm in need of a little recovery. My recipe today has all the major requirements needed to recover from an adventuresome trip to Disney. The requirements are: Booze-check, Chocolate-check, Coffee-double check (coffee liquor and coffee granules). This should certainly get the job done!! Enjoy!


Boozed Up Recovery Brownies
AKA Kahlua Cream Cheese Brownies
adapted from here
Cheesecake Filling
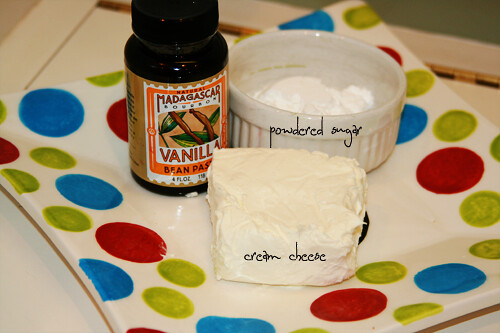
8 ounces cream cheese (1 package), at room temperature
5 Tbsp. butter, at room temperature
1/4 cup sugar
1 large egg
1 Tbsp. Kahlua (or other coffee liqueur)
Brownie layer
Vegetable oil spray, for misting the pan
1 package brownie mix (19.8 ounces)
1 tsp. instant coffee granules
1/3 cup vegetable oil
1/4 cup Kahlua or other coffee liqueur
1 tsp. instant coffee granules
2 large eggs
1/2 cup miniature semisweet chocolate chips (optional)
Prepare the filling. Place the cream cheese,  butter, sugar, egg and Kahlua in a large, mixing bowl and blend with an electric mixer on low speed, or with a wooden spoon, until the mixture is smooth and well combined. Set the bowl aside.
Place a rack in the center of the oven and preheat the oven to 350F. Lightly mist the bottom of a 13- by 9-inch pan  with vegetable oil spray. Set the pan aside.
Place the brownie mix, oil, Kahlua, coffee, chocolate chips and eggs in a large mixing bowl. Stir with a wooden spoon until all the ingredients are incorporated and the batter lightens in texture, 50 strokes.
Pour the batter into the prepared pan and spread it out evenly with a rubber spatula.
Spread the cream cheese filling over the top of the batter, and using a dinner knife, swirl it into the batter to create a marbled effect.
 Bake the brownies until they are lightly browned and the outer 2 inches form a crust, 27 to 32 inches. Remove the pan from the oven and place it on a wire rack to cool for 30 minutes. Cut the brownies into 24 squares.

Thursday, May 13, 2010

Chocolate Chip Cookie Dough Cupcakes


Do you see what I see? Look closely at that little cupcake. Is there something hiding amongst the fluffy golden cake?

Yes, yes there is. Do you know what it is??? Well, if you guessed cookie dough, then you are exactly right. (If you missed that one, you need to start reading the titles of my posts a little more closely. LOL! :) Now I realize a cookie dough infiltrated cupcake seems a bit sinful, but hey, that's what we're all about here at Sinful Southern Sweets. Right?!?! Right..
I have been studying this recipe for quite some time. I finally took the plunge. It is every bit as indulgent as you are imagining it to be. Now, Mr. Sweets believes I ruined the cupcakes with the rich chocolate icing. He thinks the icing made them "too sweet." Those of you who have followed my blog for very long know, I do not recognize vile statements such as this. So,don't listen to him. He's an amateur at this whole "sinful" thing. Though, if you're so inclined, I suppose you could leave the icing off. But, you're doing so at your own risk :) Enjoy!


Chocolate Chip Cookie Dough Cupcakes
via Allrecipes

Ingredients

  • 1 1/2 cups all-purpose flour
  • 1/4 teaspoon baking soda
  • 1/4 teaspoon sea salt
  • 1/2 cup butter, softened
  • 1/4 cup white sugar
  • 1/2 cup brown sugar
  • 1 egg
  • 2 teaspoons vanilla extract
  • 1 cup miniature semisweet chocolate chips
  • 1 (18.25 ounce) box yellow cake mix
  • 1 1/3 cups water
  • 1/3 cup canola oil
  • 3 eggs
Directions
  1. Whisk together the flour, baking soda, and sea salt; set aside. Beat the butter, white sugar, and brown sugar with an electric mixer in a large bowl until smooth. Add 1 egg and the vanilla extract and beat until smooth. Mix in the flour mixture until just incorporated. Fold in the chocolate chips; mixing just enough to evenly combine. Form the dough into tablespoon-sized balls; place onto a baking sheet, and freeze until solid, about 2 hours.
  2. Preheat an oven to 350 degrees F (175 degrees C). Line 24 muffin cups with paper liners.
  3. Beat 3 eggs in a large bowl with an electric mixer to break up. Add the cake mix, water, and canola oil; continue beating for 2 minutes on medium speed. Spoon into the prepared cupcake liners, filling each 2/3 full. Place a frozen cookie dough ball on the top center of each cupcake.
  4. Bake in the preheated oven until a toothpick inserted into the cake portion of the cupcake (not the cookie dough ball) comes clean, about 20 minutes. Cool in the pans for 10 minutes before removing to cool completely on a wire rack. 
Chocolate Fudge Frosting:

Ingredients

  • 1/2 cup butter
  • 1/4 cup shortening
  • 1/3 cup unsweetened cocoa powder
  • 2 cups confectioners' sugar
  • 2 tablespoons milk
  • 1 cup hot fudge topping
  • 1 teaspoon vanilla extract  
Directions
  1. Cream together the butter or margarine with the shortening.
  2. Sift the cocoa with the confectioners' sugar and add to the creamed mixture. Mix together adding 1 tablespoon at a time of milk to keep mixture smooth. Don't add more than 1/4 cup of milk.
  3. Add the hot fudge topping and the vanilla extract. Blend until smooth and creamy.
 

Sunday, May 9, 2010

Pomegranate Cheesecake Brownies


Do you know how healthy pomegranate juice is for you? If you don't, then you should. So let me tell you...The Pom Wonderful company has several scientific studies that have been published indicating that pomegranate juice is beneficial for heart health, muscle recovery (after workouts), erectile function and prostate health. So guys, you need to be guzzling this stuff down!! Have it with a pound or two of pecans :) If you'd like to read more about the benefits of pomegranate juice you can read it here. Besides its many health benefits, its seriously good.
The fine folks over at POM Wonderful contacted me a while back and offered to send me some pomegranate juice if I would create a new pomegranate containing recipe. I thought and thought about the recipe I would bring to the table. And, then I came up with this......A Pomegranate Cheesecake Brownie. My girls loved the color of this. It was such a pretty pinkish-lavender color, much like the Berry Muffins I made a while back. Doesn't every little girl love anything pink or purple? Even better if its a mix between the two.
This dessert was such an indulgent combination of two heavenly desserts. How can you beat a brownie with a cheesecake baked on top?!?! Well...you can't! (But if you do, let me know :) This was so good, my husband even woke me up at 2am going to get a little taste of this sinful sweet. I'm sooo not a nice person when I've just woken up. Sorry, Mr Sweets. So,  I recommend serving this early in the day so its all gone before bedtime. Enjoy!


Pomegranate Cheesecake Brownie
Ingredients:
Brownie layer:
1 c sifted all purpose flour
1/2 tsp baking powder
1/8 tsp baking soda
1/2 tsp salt
1/2 c. unsweetened cocoa powder
1/3 c. melted butter
1 c brown sugar
1 egg
1 Tbsp vanilla
Mix all ingredients until just combined. Spread into a foil-lined, greased 9 inch square pan.
Set aside.

Pomegranate Cheesecake layer
8oz. softened cream cheese
1/2 c white granular sugar
1/4 c powdered sugar
2 tsp vanilla
1 egg
4 oz. pomegranate juice
1 drop red food coloring (optional, but adds a nicer color)
Cream together the sugar and cream cheese until smooth. Add the remaining ingredients until blended. Pour over the top of the brownie mixture. Run a knife through the brownie and cheesecake mixture to make a swirled effect. Bake at 350 degrees for 35-45 minutes. The cheesecake will look set, but still jiggle just a bit in the center. Let cool to room temperature. Cover and refrigerate until serving

Wednesday, May 5, 2010

Fruit Salsa & Cinnamon Chips for Cinco De Mayo


Cinco De Mayo....translate "The 5th of May." Many believe this is Mexican Independence Day, but in fact it is the day that  a small, outnumbered Mexican army defeated the French during battle in Puebla in 1862. This was a turning point in Mexico's struggle for independence. Apparently, from what I've researched, Mexico doesn't really celebrate Cinco De Mayo very heavily. I read one story about a guy that went down to central Mexico thinking he was in for a grand Cinco celebration. Yet, he was quite surprised only to find quite lackluster celebrations being held . Its told that a Mexican shopkeeper informed him that Cinco De Mayo was "a gringo holiday made to sell Mexican beer to Americans." Wouldn't you know it! Oh well, lets just go with what we know :)
The Cinnamon Chip recipe I'm sharing today was received from my sister in law. Her grandmother makes these every year for Cinco De Mayo. I can remember her talking years ago about how good these were. And she was right!! They are very easy, but really great! These are perfect for snacking on. Though you could also drizzle these with honey and top with ice cream for a sopapilla dessert. Today I'm serving them with fruit salsa.
The fruit salsa was something I had first experienced at a party I attended a month or so ago. Its light and refreshing and makes the deep fried Cinnamon Chips seem just a touch healthier (if that is indeed even possible). Hope you have a wonderful Cinco De Mayo! Enjoy!

Fruit Salsa & Cinnamon Chips

Fruit Salsa:


 Ingredients

2 kiwis, peeled and diced
2 Golden Delicious apples - peeled, cored and diced
8 ounces raspberries
1 pound strawberries
2 tablespoons white sugar
1 tablespoon brown sugar
3 tablespoons fruit preserves, any flavor

Directions

In a large bowl, thoroughly mix kiwis, Golden Delicious apples, raspberries, strawberries, white sugar, brown sugar and fruit preserves. Cover and chill in the refrigerator at least 15 minutes.

Cinnamon Chips


 1 cup oil for frying
8 large flour tortillas
1/2 cup white granular sugar
2 tablespoons ground cinnamon
  
Heat oil in a medium heavy saucepan to 375 degrees F (190 degrees C).Slice flour tortillas into triangles. Carefully place tortilla triangles into the hot oil and fry until puffed and lightly golden brown,  1 or 2 minutes. Drain on paper towels. Place white sugar and cinnamon in a large Ziploc plastic bag. While still slightly warm, drop fried tortilla triangles into the bag and shake to coat. 

Serve the cinnamon chips warm with the chilled fruit salsa.

Saturday, May 1, 2010

Cinnamon Roll Cookies

Cinn500
Today I have a review and a fabulous recipe for you! It was such an honor to be part of the Cooking.com’s test kitchen this month. I was asked to review the Chicago Metallic Non-Stick Muffin Top Pan.


This was such a great product. It is very well made and not too light weight like some bake ware. First I thought about making muffin tops with the pan, but then I went a non-traditional route. I had been eyeing a fabulous recipe called Cinnamon Roll Cookies over at the Picky Palate. These cookies were just amazing and the pan was perfect for the job. I had first tried baking these cookies on a traditional flat baking sheet, but they had a tendency to spread . The muffin top pan enabled me to bake a couple of cinnamon roll cookies together in a cluster and they held their shape perfectly!
So, lets get started. Here’s the cast of characters for the dough:
Flour, salt, vanilla, sugar, baking soda, baking powder, butter, sour cream and eggs.


Wisk together the flour salt, baking soda and baking powder. Set aside. Cream together the butter and sugar. Add the sour cream, eggs and vanilla until well incorporated. Slowly add the flour mixture to the butter mixture. Mix until combined, but do not over mix. Separate into 6 separate disks. Cover with plastic wrap and refrigerate for 2 hours. Note: Do not skip the 2 hour refrigeration. The recipe won’t work


After refrigerating the disks, roll out 1 disk into a 9x13 rectangle. Spread with butter. Sprinkle with cinnamon and sugar.

Starting at the long end, begin rolling up jelly-roll style.


Slice off in 1/2” segments making the rolls/cookies.


Place 2 cookies in each circular muffin-top area. Repeat with each disk until all the dough is made into rolls.


Bake at 350 degrees for 10 minutes. Cool Completely.

Then make the icing…..No, the icing is not optional, you will soooo want the icing

Here’s what makes up the lovely icing:


Powdered sugar, vanilla, cream cheese (plus a little milk, imagine you see it. Simple, but wonderful!

Cream the cream cheese with the powdered sugar until smooth. Add in the vanilla until smooth. You may thin the icing down with milk to reach the desired drizzling consistency.

Here’s another thing I love about this pan: Super easy cleanup. Look at this picture:


See, some of the brown sugar had seeped out of the cookie. Usually this would be a burnt-on mess. Not with this pan, the non-stick coating made the melted sugar lift off with ease. Thank Cooking.com! Enjoy!


Cinnamon Roll Cookies
via Picky Palate

2 Cups sugar
1 Cup butter, softened
3 eggs
1 teaspoon vanilla
1 Cup sour cream
6 Cups flour
2 teaspoons baking soda
2 teaspoons baking powder
1/4 teaspoon salt
12 tablespoons softened butter, (slice 2 Tablespoons 6 times totaling 12 tablespoons)
1 1/2 Cups packed light brown sugar, divided into 1/4 Cups
1 1/2 Tablespoons ground cinnamon, divided
Frosting
8 oz softened cream cheese
1/2 Cup powdered sugar
2-4 Tablespoons milk, to thin icing
1. In an electric or stand mixer, cream the sugar and butter. Add eggs, vanilla and sour cream until well combined. Slowly add in the flour, baking soda, baking powder and salt until well combined.
2. Separate dough into 6 disc shapes and chill for at least 2 hours for best results.
3. Once chilled, roll into a 1/8 inch thick rectangle, about 13 inches X 9 inches. Spread each rolled pieces of dough with 2 Tablespoons softened butter, 1/4 Cup packed brown sugar and 1/4 teaspoon cinnamon. Start rolling from the long end closest to you, rolling into a log shape. Using a sharp knife, cut 1/2 inch pieces of dough then placing onto a silpat or parchment lined baking sheet. Bake at 350 degrees for 9-11 minutes. Remove and let cool for 5 minutes before removing from baking sheet.
4. To prepare frosting, beat the cream cheese until softened and smooth, slowly add powdered sugar, vanilla. Add milk until desired consistency. Frost cookies then place in refrigerator until ready to serve.